Tuesday, July 31, 2012

To mix, or not to mix, that is the question...!

Sorry I disappeared for a while there, didn't I?!, We've been away for a few days visiting family in the Lake District.  I don't like to blog about going away until afterwards, otherwise, it feels like shouting 'Hey, our house is empty, come..., break in and steal stuff!'.

The school holidays are plodding along, and today I have been left asking the question, 'Why oh why have I never made home made play dough before?!'  It's so easy.  There are lots of recipes out there to choose from, I can't remember exactly where this version came but this is what we did...,

You will need  ::  2 cups of plain flour, 1 cup of salt, 2 cups of cold water, 4 tablespoons of vegetable oil, and 4 teaspoons of cream of tarter, food colouring (I used red, yellow, blue and green), a large saucepan, wooden spoon, whisk, airtight containers or zip lock bags to store it in and a stove.

Plonk all the ingredients (apart from the food colouring!) in a saucepan on the stove top, and stir.  Now, mine went lumpy at this point so I gave it a quick go with a whisk.  Then turn on the heat, a low heat is all that's needed, and keep stirring with a wooden spoon.  The mixture will gradually thicken, don't worry if more lumps appear at this stage, it will even out when it comes out the pan.  After a couple of minutes, the spoon will become harder and harder to move as it turns into a dough.  At this point, turn off the heat, and turn the dough out onto a work surface and allow to cool.  Then give it a quick kneed, and there you go, that's the cooking part done, now for the messy bit!

This recipe gives a fairly large quantity of playdough, so we split ours into 6, placed each on a glass chopping board, made a well in the centre then added a teaspoon of food colouring (the liquid kind), and kneeded and kneeded until the colour was evenly dispersed, adding more food colouring along the way if the colour was too pale.  We also mixed our colours to get orange and purple.

Luke's favorite is green!

Now the big question amongst us Mums.  Do you let your children mix up their playdough colours??, we have a difference of opinion in our house, I don't mind if they get mixed up to make a yukky brown, which is why all our colours are just chucked into a zip lock bag together.  My theory being by the time all the colours are mashed up, it's drying out and needs replacing anyway.  My husband disagrees, he hates seeing it all mixed up, it really grates on him!  

So, to mix or not to mix, that is the question?!

PS, Thank you for all the foxy feedback, fox number 2 is the out and out winner by far!  I shall be asking opinions on softie patterns more often, that was huge success!

Monday, July 30, 2012

2012 Sewing Calendar,

Last year, I was lucky enough to be included in the 2012 Sewing Calendar by Accord Publishing.  A feat which has been repeated again this year too, and earlier this week, my copies arrived.


As with last years calendar, this one has also been put together by Megan Smith, which is a huge task to undertake, as you can see in the picture above, it includes over 100 projects.  There are 5 projects from me, Valentine's Day love letter, Wristwatch pincushion, and the Christmas Robin are already available in the blog sidebar,


but the Chicken Softie and coordinating Chick Finger Puppet are new.


The projects are organised throughout the calendar to correspond to yearly events, such as Easter and Christmas, and the display box everything comes in is designed to fold back on itself so it can sit on a tabletop and be easily accessed.  Even though many of the included projects are available online, this calendar is a hugely valuable resource.  There is no need to print anything out as everything, including templates (thus avoiding any problems in getting the scale correct), needed for each project is included within each project page.

The 2012 Sewing Calendar is already available to buy now in both the USA and UK.

Sunday, July 29, 2012

Noses...

I'm on a quest to find a new way of adding noses to the larger cat softies that I make, like this one here, which popped up on Softies Central this week.  After being unable to find suitable triangular shaped pink buttons, it was suggested to me to try polymer clay, and make my own...!

Well, I've given it a try.  Maybe the weather is too warm at the moment, I found it really hard to shape as the clay had gone a bit too squidgy or maybe the tools I was using were inappropriate (they were from the kids playdoh set!).  I will give it another go, has anyone made their own buttons before?  Any tips to share would be much appreciated.

PS, the tantrum free summer is going pretty well, there have been a few close calls but so far, so good! 

Saturday, July 28, 2012

Spoons,

You may remember a while ago I posted a sneaky peek of something I'd been designing.  That something is spoons.  After collecting some ideas together on Pinterest, I began working on the first pattern for bringing the idea in my head to life...


The first attempt didn't quite work.  I made it using two layers of felted wool, with darts to achieve the spoon shape, but the whole thing was a bit on the flat side.  The idea then began to develop towards the idea of welsh love spoons.


This one is a bit more like what I am trying to sculpt.  


It's still a bit of a work in progress design wise,


but as a project, it's certainly fulfilling the desire to move away from the cute animals are try something a bit different.  Only problem is, they are hard to photograph without it looking,

...a little bit phallic!

Wednesday, July 25, 2012

Pandora's Box...

Apologies for the unexpected hiatus, our kitchen fiasco has become a bit all consuming this week, but we are now on the way back up (I hope!).  Our kitchen has been a bit of a 'Pandora's Box' from the start, so, trying desperately to stay positive about loosing the floor, has led us to finally start decorating the room.  So, today, I have painted 3 coats of white (it still looks patchy) onto what was a bare plaster ceiling, and being such a messy job, I have virtually turned myself into a human paint brush and am covered in white paint drips!!

(latest wip, which has unfortunately had to go on the back burner due to kitchen mess)

Now, down to the serious business, first, there is an interview with me here, and second, the winner of the toadstool giveaway is...

Amy from My Zoe Bug

So, if you can email me your address, I will get the toadstool off in the post.  

All I need to do now, is swap the paint brush for a sewing needle and camera, and there will be a new tutorial to post, watch this space...!

On a roll...

A couple of weeks ago, I wrote an article all about crafting with fabric for 'Craft Business' magazine, a UK based trade publication. It was actually quite interesting to write and a project I would be happy to do again. It occurred to me while I was researching, that so many of the craft magazines available have specialized in paper crafts for a long time now. I would really like to see more fabric and sewing based projects and ideas returning to their content.

If you would like to read the article in full, here is the web site. You would need to register in order to download the latest issue, number 45, but it is a very interesting read, covering latest developments and news in the craft industry and is available online bi-monthly.


Edit to post - I've realised, that if you click on the above page images, they should pop up large enough to read, thus avoiding registering on the Craft Business web site. That makes it easier!


Sunday, July 22, 2012

How much...??!


In addition to selling handmade craft items through online market places like Etsy, I often, as I imagine most blogging crafters also do, get a lot of speculative email enquiries.  The difference I find with being approached in this way, is that when a potential customer is browsing through an online shop, they can already see the prices there next to the item.  But when someone makes a direct enquiry, they genuinely have very little idea how much a commissioned item is potentially going to cost, and they are, in my experience, usually a little shocked.  Even though the asking price may well not be particularly high.  Herein lies my personal pricing dilemma, one which I suspect other crafters may well recognise.

I find myself cringing, when replying back with a price.  Then I ask myself, why is it making me cringe so much?  There are no hard and fast rules when it comes to pricing craft items, and most crafters will already know this basic formula for working costings out,

materials + labour + overheads = minimum sale price

what about this next formula?

materials + labour + overheads + % profit = minimum sale price

I quite often feel like 'profit' can be a bit of a dirty word.

Looking at this another way, this time in terms of a comparison to drawing a salary.  A small softie, eg a cotton reel pincushion, lets say I charge £12 ($18.34).  It takes just less than 2 hours to make from start to finish, so divide £12 by 2, and that's £6 ($9.17) an hour.  In the UK, from October, the minimum wage will be £5.93 ($9.06) an hour.  Am I, despite being Degree educated and having 12 years worth of industry experience, really only worth 7p (11¢) more?

But can I realistically charge more than £12?  In all honesty in the current global financial climate, no I don't think I could.  The end product is after all, despite being handmade, just a pincushion.  Which leads me to ask, do I automatically devalue it myself by making it into something practical?  If the same item was marketed as an art object instead eg, vintage cotton reel soft sculpture, how much impact, if any, would this subtle re-branding have on its commercial value?

The answer lies partly in breaking down the business model behind each product any crafter makes.  Looking at the figures I've quoted above, a cotton reel pincushion would not be classed as a commercially viable product.  They take too long to make (or I probably need to speed up) when compared to the income generated.  I make them because I like to make them and they look cute.

I am certain I can't be alone in feeling like this, and hope this post will open up a bit of a discussion about pricing as I would dearly love to hear your experiences...

Friday, July 20, 2012

40,


 Had to flip the card in the photo so you could read it!

Thank you for all the birthday wishes, I've had a fab weekend.  My birthday on Friday was kicked off with my Mum arriving to look after Lucy & Luke whilst we went off to Cambridge for 2 days & 1 night.  Then me & Mum spent the day here on Sunday.  We had a morning in the spa followed by a massage, facial and a pedicure.  For the first time ever, I have painted toenails.  Chocolate brown toenails!

There are no photo's as all the good stuff has either been eaten or just purely indulged!

Fox softie dilemma...,

I'd been meaning to re-visit the Fox softie pattern I started a while ago, and after a trip to the local charity shop resulted in an ideal coloured woollen jumper to felt, there was no excuse!  The original pattern got tweaked slightly, but while I was sewing, another idea kind of popped up.  When I begin a new pattern, the first decision I make is whether it's going to be a side on profile or front on profile.  Usually, it's an obvious choice as to which will work best, but in this case, I'm not quite so sure...!

So, here we have them both,

FOX 1,

and FOX 2,


(Fox 2 from a different angle)  


So, I need your help on this one, which do you prefer?

FOX 1 or FOX 2?

Tuesday, July 17, 2012

Help!, the summer holidays are coming... and a GIVEAWAY!

I'm sure I'm not alone in feeling a state of panic coming over me.  School finishes on Tuesday for the summer, 6 weeks of attempting to keep everyone happy, entertained, and fed on a very tight budget, what fun!  So, what better way to start the summer fun, than with a giveaway!

Come September, things are going to change for me.  Luke is starting pre-school, which will give me 3 whole days a week to work, and chance to begin putting all my plans for this little business into action.  Every move forward means leaving some things behind, this is a philosophy I often apply to my work.  I'm an ideas person, hence all the tutorials popping up, and after posting a while back about me not being a sketch book person, I actually realised I use my blog kind of like a sketch book, a place to note things down, try things out, some I use again, some I will go back to in the future, and some I wish I'd never posted!.

So, moving on from some of my older work, leaves space for the new to flourish, and means  I'm going to give away my tutorial toadstool...

leave a comment by midnight, Sunday 20th July (tell me your tips for a tantrum free summer!), and I'll do the draw for a winner on Monday morning.  This is also a way to say thank you, I've had so many visitors and inspirational comments left recently, I'm struggling to find the time to visit everyones blogs to comment back, and keep sewing!.  I might have to throw in a few left over birthday chocolates too, I'm starting to feel ill, I think I've eaten too many! 

EDIT TO POST

I'm going to have to leave this running for a couple more days, we have had a bit of a disaster this weekend, involving our kitchen floor, damp, what looks like could be a leaking pipe and worst of all, ants nests, so it's all hands on deck in the Lucykate household!

Monday, July 16, 2012

Fun with felt and the last 2 interesting facts!


There are lots of birthdays coming up plus it is almost the end of term and I decided to make the teacher and assistant something rather than buy. So the evenings have turned into a little production line, this is the result so far. The brooches work really well attached to the front of a card, they can be removed after the event and hey presto, you have your gift! This lot is using some more of the printed felt I got from Coats Crafts UK and also 1 solitary felted ball made from their 'Filz' fiber range. I have yet to perfect my wet felting technique and this is the only ball that stayed in one piece, so any tips or advice on how to do it is welcome!.


This lot are made using felt from my ever increasing stash and some patchwork and Rowan fabric. The green, brown and orange one is for a friend, who wears a lot of brown and orange, I just hope she likes it.


The pink and brown one is actually for ....... me!. Which leads me to intesting facts no's 6 & 7,

Today is my birthday, I am 37 and the brooch is my present to myself. We even have a babysitter tonight and are going out for a meal without the children for the first time in ages.

And, yesterday evening, I became an aunty again. My youngest brother and his partner had a little baby girl, Pollyanna, weighing in at 6lbs 10ozs so congratulations to them all.

Sunday, July 15, 2012

I look down, and I see...

a sucked in tummy clad in Orla Kiely!

This is my new Ebay purchase, an Orla dress and I love it!


I'm not as fond of all the Orla patterns as I am of the scribble design.  You may have noticed my blog background changed when I realised you can make the pattern in Photoshop.


It's a birthday present to myself, am 41 tomorrow, eeeeeek!

Toadstool round up...

I think it's time to round up the toadstool swap.  Here is just a small selection of the lovely things that were made...

(can you spot the tiny mouse?!)

I wish I could show more, but it's taken forever and a day just to build that mosaic, you can see more in the Flickr toadstool swap group pool.  If you are still to receive your swap toadstool, you are in good company, mine hasn't arrived yet either, but I did get this in the post...

(look at that amazing stitching, it's so neat)

It's from Louise at Prairie Mouse, and it's beautiful!

Thank you for all the lovely comments for the cotton reels, I won't be posting a tutorial for those just yet, I have other plans for them.  But don't worry, there will be plenty more tutorials coming up, I'm certain, one day, there is a craft book inside me just bursting to come out!

Well, I'm going to take a couple of days off, it's my birthday tomorrow and I will be...

a 38 year old, shopping, eating take away and in denial that I'm one step closer to the big 4 0!

Pins & needles,

I've been (finally, after what has been a rather longer gap than intended!) putting together a few items to put up on Etsy,


 and first off the press are some cotton reel pincushion,


 which will be making an appearance soon when I have more time (and better light) to photograph them better.


 Until then, I believe I need to pack an overnight bag.  Tonight I go to bed as a 39 year old, clinging on to her 30's.  

Tomorrow, I wake up 40.

EEEEEEEKKKKKKKKKKKKK!

Friday, July 13, 2012

News 'n' other stuff...,

There have been a few unexpected surprises over the last week, cheques turning up through the post for magazine projects I'd all but forgotten about, a mention in a new sewing magazine (thank you Claire!),  and this...,

2012 Sewing Calendar, from Andrews McMeel Publishing, now available for pre-order on Amazon.  There are instructions to make 100 projects, including a few from me, look, thats my toadstool on the front!

I've also just had word of some new projects being selected for a collaborative pattern book too, more on that soon though!

ps, I think my computer chair may be broken, while I've been typing this it's gradually gone down, I'm now almost sat on the floor!

Thursday, July 12, 2012

Rabbit, rabbit, rabbit...


This is an idea that had been simmering for a while. When I worked for Coats, we had a lot of Beatrix Potter cross stitch designs in the range which were consistently popular. I had seen animals made out of toweling in a book by Tone Finnanager and thought it would be great to try a rabbit using an old towel and mixing it with some of the Beatrix Potter printed fabric.


The fabric has a lovely vintage look to it as it is from the original illustrations. To dress the rabbit, I made a little apron out of felt, and a carrot to go in the pocket. I'm not sure I can actually do anything with the rabbit, as it does say on the fabric, 'not to be used commercially'. After my time in the industry, I am very aware of copyright issues, as we spent a huge amount of time going through lengthy approval processes with all the character licensed designs. A very tedious process which I do not miss and one of the reasons I wanted to work for myself so much. I count my blessings every day, as that is now what I am able to do!

Wednesday, July 11, 2012

Cotton reels,

I love old cotton reels, there is something very appealing about all that wound up thread waiting to be sewn with.  For a while, I have been wondering if there was a way of making a cotton reel out of fabric, felt and embroidery.

With some tinkering around involved, I came up with a pattern and began a little cotton reel production line.  After I'd added a felt label to one end, I sat staring at it for a while, and thought, this would make a great pin cushion!

Funnily enough, the other day, I'd already ordered some key rings, so attached one to the pincushion, and made a little needle book to match.  Was really handy for storing all my bits and bobs when we went away last weekend.

Oh, and if you happen to see a copy of the August issue of 'Quick & Crafty' magazine, turn to page 70 for a little interview...

...with me!

Thank you for all the lovely jam pot comments, we will have the best dressed jam in the land!

(sorry for the terrible photos, it's rain, rain, and more rain here, where is summer hey?!)

Monday, July 9, 2012

Wildlife update,

The Beaver, is a primarily nocturnal, semi aquatic rodent with two main species, the North American Beaver and the European Beaver.  They are best known for their natural trait of building dams on rivers and streams.  Their population has been dwindling worldwide, and in Europe, they have been hunted almost to extinction.  However, in recent years the Beaver has began to be re-introduced throughout Europe, including Scotland and a select number of areas within the english countryside.


To protect the Beaver, and their still fragile community, new breeds have been established which are harder to spot.  If you see one, you have been extremely lucky indeed.

Embroidery threads,

I've never really been one to pay much attention to brand names, but have to admit to having always favoured Anchor embroidery threads, mainly because I worked for Coats as a Designer for nearly twelve years, and as a result, have quite a supply to hand.

But, a while ago, I was sent some threads by DMC.  Now, from my experience of the UK needlecraft industry, there has always (and probably still is!) a bit of rivalry between Coats and DMC.  In my fledgling days as a designer, myself and a colleague were sent to spy on the DMC stand at a trade fair in Germany, only to be recognised and asked to leave.  I am certain the DMC design team will have been simultaneously spying on the Coats stand too!  

So, I guess, now I work for myself, I am free to choose.  I've not used the DMC pearl cotton before, but today my needle is threaded and I'm giving them a go.

Which do you use?

Friday, July 6, 2012

Very cross, cross stitch,


Apologies for the lack of posting this week.  The last few days have been a bit of a mixed bag.  Work wise I'm working on a really interesting freelance project involving cross stitch.  The flip side is that the word 'cross' has been very prevalent.  Don't wish to go into too much detail but Lucy was attacked in the playground at school on Monday by another pupil.  Hopefully the rest of the week will be a little calmer!

Thursday, July 5, 2012

On my desk today,


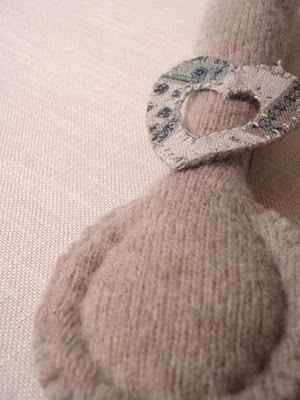
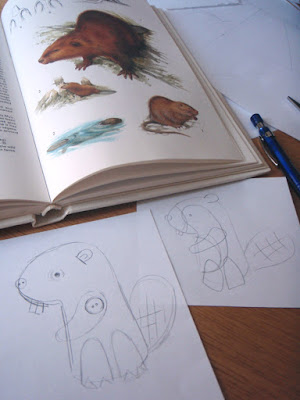
I'm working on a new pattern for a Beaver, which, as always begins with a bit of sketching, and seeking out reference material.  Look at that, in this online era in which we live, a book!  Still the best place to start in my opinion.

It doesn't matter what I do, my softie designs always come out looking a little comical.  I guess it's just my style.  There are many other softie designers whose style I admire, Tamar (of course!) and Lauri to name two.  I find their work to have an edge I fear mine lacks, but that is something I've long since come to terms with.  Design style is something that constantly develops.  The designs I do now, are very different to how I was working when I began blogging three years ago, and no doubt in another three years, it will have evolved again.  There is an opportunity on the horizon to push myself to be a bit more experimental, I've been accepted to show at Plush You 2012 in Seattle.  Eeeek! what shall I make?, suggestions needed, animal, object, ...monster?!

Wednesday, July 4, 2012

Meet Rosie...


Inspired by this, by the rather wonderful Molly Chicken, Rosie was born after two evenings fiddling around with felt. She is going to need some friends I think, but they will be on hold while I do some rabbit creating with an old towel, to be revealed shortly. Rosie is photographed on a charity shop pillow case bought for 50p, shame there was only one as I love the colour and pattern on it.

Monday, July 2, 2012

Tis the season for strawberries...

I've noticed there is a lot of jam making happening in Blogland lately, plus with Wimbledon also on, and so thought this tutorial for a really easy jar jar topper might be useful, if you have jam left over you'd like to give as a gift.


To make one for strawberry jam (the pattern can be easily adapted for other fruit), you will need - 
 
a jam jar with lid (mine is 8.5 cm across, and notice, once again for the purposes of photography, I have 'stunt' jam, not homemade!), a circle of felt measuring 16cm across (you will need a larger piece if your jam jar is larger than mine), two pieces of red felt 2.5cm x 4.5cm, another piece of red felt cut into a strawberry shape about 3cm tall, a small amount of green felt for leaves, about 58cm of narrow ribbon, some red, green and yellow embroidery thread (I've used pearl cotton 8), a small amount of stuffing, pencil, pins, sewing needle and some scissors.

First, scallop around the edge of the large felt circle, I just used normal scissors for this and did it freehand, but if you have some scalloped edge scissors, you could use those.

Then, place the jam jar lid centrally, and draw round it with a pencil to mark its position.  Thread the needle with the ribbon, weave it in and out all the way round, 1cm away from the drawn circle.  You may need to poke a small hole with some sharp scissors first, just make sure that both ends of the ribbon come out on the top side of the topper so they can be tied in a bow.

Next, to make mini strawberries to decorate the ribbon with, fold the red rectangle in half, and sew down one of the open edges which is at a right angle to the fold.  Trim the open side to a curve,

turn the shape inside out so the seams are on the inside, fill with a little stuffing, then sew running stitch all the way round the open edge, and pull to gather.

Before you sew it up, poke in one end of the ribbon, then secure the top with a few stitches.

Next, decorate the strawberry with a few yellow french knots, cut 4 small leaf shapes out of the green felt, and sew them to the top with the green thread.  Repeat, for the second strawberry.

Place the topper on the jam jar, and gather the ribbon, then pin the felt strawberry shape centrally to the top.  Applique it on by sewing blanket stitch around the edge, leave a small gap at the top, fill with a little stuffing, continue stitching to close it up.

Again, decorate the strawberry with some yellow french knots and add some more green felt leaves.  Then pop your topper back on your jam jar and tie the ribbon into a bow.  The good thing about making this in felt, is felt is quite forgiving, it is really easy to sew with, doesn't fray, and has a little 'give' in it so will stretch to fit if it's a little tight.

There you go, all you need know are some scones, clotted cream and a pot of tea!

If you make something from one of my tutorials please do join the Flickr group, Lucykate Crafts... pattern pieces, to show off your creations.